Showing posts with label Christmas. Show all posts

Friday, 21 December 2012

Teacher Gifts

12 Days Of Christmas ~ Day 8

Our teachers work so hard daily to mold and teach our children, they are hard working and dedicated and deserve a little something for all their work.  


Each one of our teachers got a popcorn bowl which I added the vinyl popcorn to.  The kids and me made them some yummy sugar cookies that we put into the tins and added popcorn bags and popcorn seasoning. 


Wednesday, 19 December 2012

Quick and Easy Christmas Dinner Salad

12 Days of Christmas ~ Day 7

Growing up this was a salad that our family had at Christmas just about every year.  It is quick and easy and you can make it in advance.  I actually suggest you make it at least one day in advance as the dressing marinates and makes it so much yummier.  


Ingredients You Will Need

Broccoli
Cauliflower
Radishes
Green Onions
2 Cans Whole Mushrooms
Italian Dressing

I make a big family sized bowl of salad and mix up all your yummy veggies and then I use about 3/4 of a bottle of dressing.  You can add more or less depending on what you like.  Let it sit for at least one day. 

Come Check out or other 12 Days of Christmas Posts.


Tuesday, 18 December 2012

Sugar Cookies

12 Days of Christmas ~ Day 6

Sugar Cookies are a staple go to cookie in our house but especially at Christmas time.  This is something my kids love to help me with from making the batter to decorating with icing. 


Sugar Cookie Recipe 

3 1/2 Cups Flour
1/4 tsp Salt
1 tsp Baking Powder
1 Cup Unsalted Butter
2 Large Eggs
1 1/2 tsp Vanilla or Almond Extract

In a separate bowl place Flour, Salt & Baking Powder and whisk to combine.
Beat Butter & Sugar until light and fluffy.  Add eggs and vanilla and beat until combined.  
Add Flour Mixture.
Wrap in plastic and place in fridge for 30 to 60 Minutes.
Bake @ 375 for 11 - 14 Minutes. 

Sugar Cookie Icing Recipe

3 Cups Icing Sugar
1/3 Cup Softened Butter
1 1/2 tsp Vanilla or Almond Extract 
3-4 tbsp Milk (depending on the consistency you want)

Beat Butter and slowly add icing sugar add Extract and Milk


We hope you enjoy these as much as my family does.

Come Check out our other 12 Days of Christmas Posts
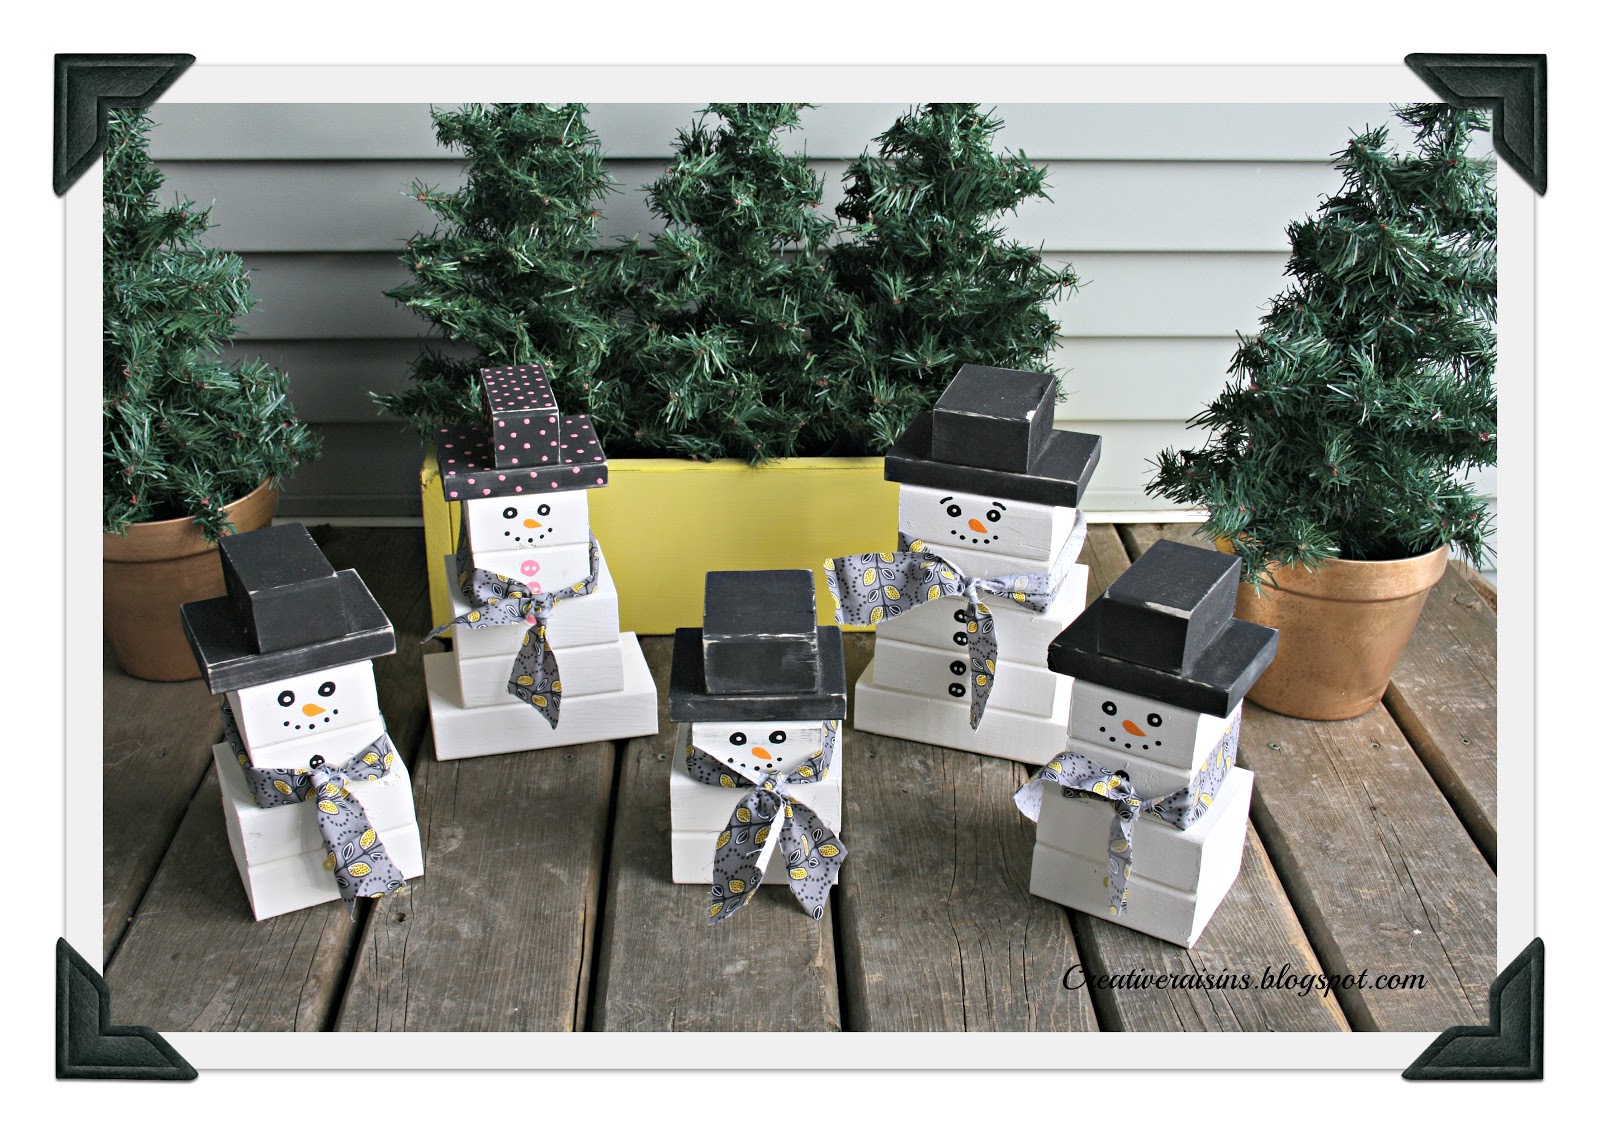


Tuesday, 11 December 2012

Feather and Stamp Ornament

12 Days of Christmas ~ Day #5

Wow the time is ticking down and there isn't too long until the big day gets here.  

Back in November Amy over at One Artsy Mama asked if anyone wanted to do an ornament exchange.  Well for a girl who loves Christmas and anything that comes with it I said yes.  

So I came up with these glass ornament balls filled with feathers and topped off with a hand stamped hope washer. 


Earlier this year my hubby had acquired an alphabet letter stamp set at an auction for me and this project was my times getting some good use out of it. 


Thank you to Amy for organizing this ornament exchange it has been fun to do and to see what others have come up with.  If you want to check out all the other projects be sure to pop over to One Artsy Mama.


Come check out our other 12 Days of Christmas Posts

1.  Snowman Family
2. Christmas Morning Quiche
3. Believe Rustic Sign
4.Gingerbread Houses

Tuesday, 4 December 2012

Gingerbread Houses

12 Days Of Christmas ~ Day #4

In my house it wouldn't be Christmas without the tradition of making gingerbread houses.  It is one of my boys favorite things and they look forward to it every year.  This year instead of using graham cookies I thought I would make the real deal.  I found a gingerbread house cookie cutter at Michaels.  

This part really turned out to be half of the fun for the boys and made this process take a few days.  We found our recipe off of Simply Recipes.

Once we had the gingerbread pieces all baked and iced together it was time to get to the good part, Decorating.


For me it is really fun to watch how their gingerbread houses progress through the years.  

Check out our 12 Days of Christmas Projects


Tuesday, 27 November 2012

I Believe

12 Days of Christmas ~ Day #3

I am just in love with how this turned out, it makes me smile every time I come home.


When I made this I wanted something that you could see from a distance and that had a weathered, rustic look to it.  
I made this by using layers of various colors to get the layered look.

12 Days of Christmas Projects.


Sunday, 25 November 2012

Christmas Morning Quiche

As promised I am here to share with you my second item on the holiday list.  Frankly this is a winner in my house all year round and they don`t last long when they are made.  My kids even love to take them to school instead of sandwiches.  If you have followed some of my recipes before you know I am kind of an eyeball girl and don`t really have a set recipe but I will give it my best shot because they are just so darn yummy.

What you will need
30 pack of Sweetened tart shells
Package of Bacon
Cheese
Eggs
Maple Syrup


I use approximately a dozen eggs and whisk them together with about 4 tbsp of maple syrup.


A few years ago my mother in-law made quiche for an event and by accident bought the sweetened tarts, since then we don`t make them any other way.  First I cooked my bacon  and then cut it up into small pieces.  If you want onions, mushrooms or anything else you can add them at this time but I like to keep it simple.


 Once I grate the cheese I like to cut it up so it is smaller pieces that will fit into the tarts better.  Then it`s time to fill the tarts with the eggs, I like to layer the cookies sheet with parchment paper because I tend to over spill a few times filling them up.

I bake them in the oven at 350` for about 25 minutes or until golden brown.  


These are great for a quick morning breakfast on the go or to add to a brunch.  I like to make alot and then freeze them so we have lots on hand.

Give them a try and let me know what you think.

12 Days of Christmas 


Monday, 19 November 2012

Snowman Family

Well it is here again,  my favorite time of the year.  My Goal this holiday season is to do Twelve holiday crafts, baking or gifts to share with you.

For my first one I decided we needed to have ourselves a little 2x4 snowman family.  This was fun for the kids as they got to help out with sanding and picking out their button colors. 

This was such a fun project to do.  Truly the hardest part was figuring out what size they should all be. 


I used 2x4's for most of the snowman and then 1x4 for a part of the hat.  I simply glued all the pieces together and waited patiently for them to dry.  


Once they were all dry each one got two coats of paint and a little sanding. Then it was time for the kiddies to head down to my paint drawer and figure out what color of buttons they all wanted.


  Aren't they fun

Hope you Enjoy