Showing posts with label Outdoor Projects. Show all posts

Tuesday, 27 November 2012

I Believe

12 Days of Christmas ~ Day #3

I am just in love with how this turned out, it makes me smile every time I come home.


When I made this I wanted something that you could see from a distance and that had a weathered, rustic look to it.  
I made this by using layers of various colors to get the layered look.

12 Days of Christmas Projects.


Wednesday, 18 July 2012

Dinosaur Fossils

One of the ideas on our Summer Fun List was to do Dinosaur Fossils so after searching around I found this cool idea on Pinterest over at Summer Campground Director and my kids had such a blast doing it.  


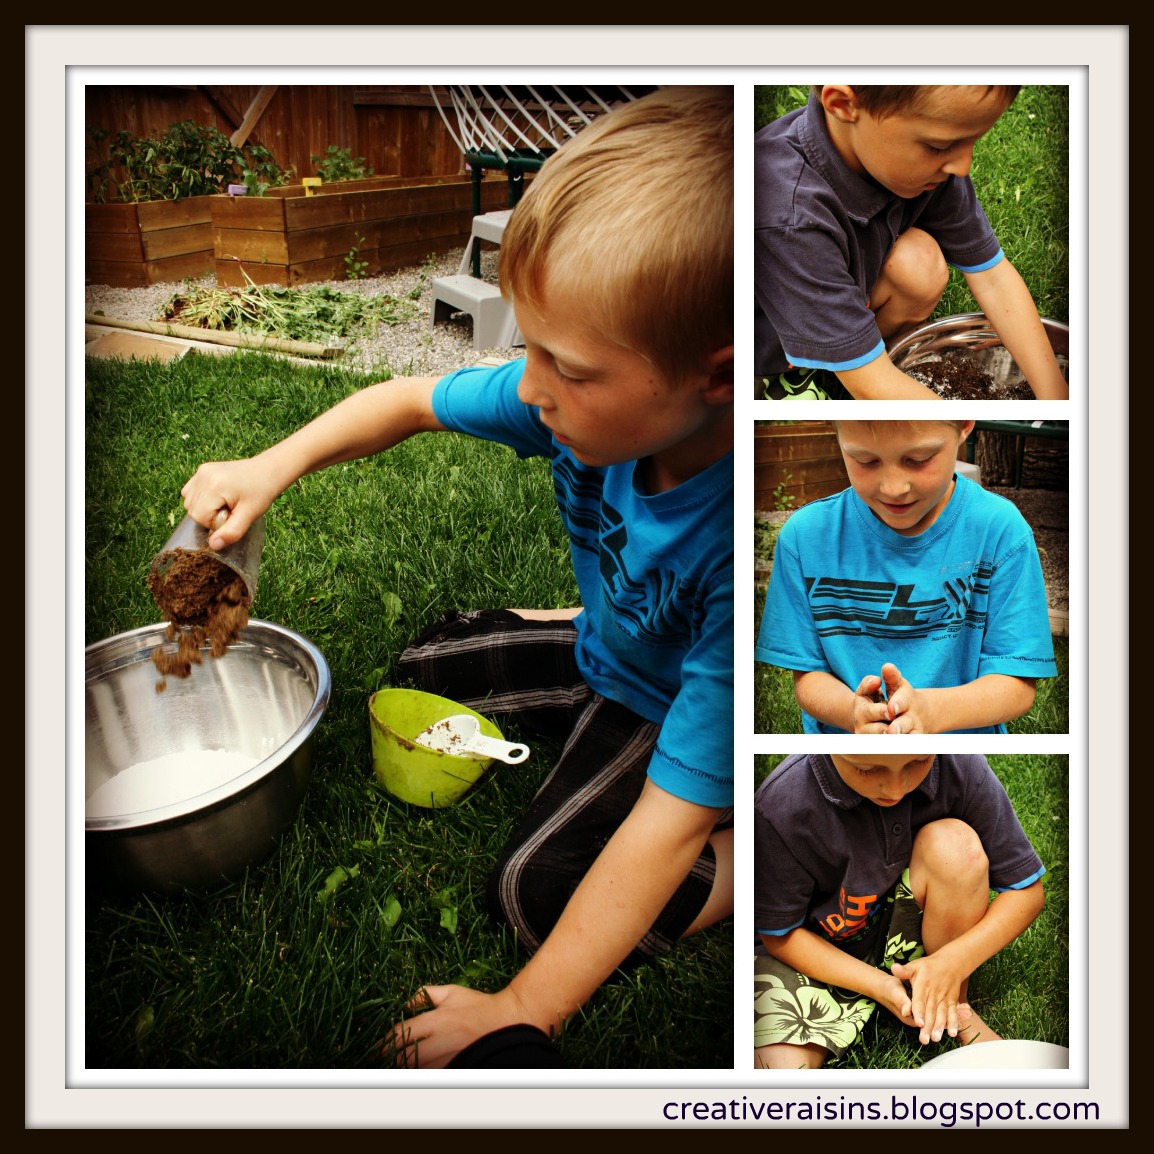
Of course they loved putting all the ingredients together because it was messy it just makes it that much better.


After mixing up all the goodies we made up the eggs by making little patties and putting the dinosaur in the middle and packing them really good. 


After waiting 4 days it was finally time to crack them open and find their Dino prize.  


They had a great time doing this and most of the ingredients for the mix was either in my backyard or in my pantry.  You can get all the ingredients and the full tutorial over at Summer Camp Director.


So another check on the Summer Fun List and some happy boys.  


Tuesday, 6 December 2011

Oh Christmas Tree

Christmas Is absolutely one of my favorite seasons to decorate for.  It is just built into me.  My Grandparents have an entire attic filled with Christmas decorations, my dad loves to decorate it is just a part of me.  If I had it my way we would light up the house like the Griswalds but my husband has politely said no to that, lol.  Each one of my children have their own Christmas tree to decorate and make special in their own way.  I just love it.  

I have seen many different interpretations of the wooden Christmas tree and I just loved it so much that I needed one for myself.


 I am not a tradition person when it comes to Christmas colors so I wanted to keep with the bright pinks and greens colors for this project. 
This was such an easy project to do and the it turned out exactly how i wanted it.

Monday, 3 October 2011

Guest Post At Creative Carmella

I am so excited today to be over at Creative Carmella guest posting.  She has recently added another addition to her family and needed a little help while she was spending time getting in all the snuggles and mommy time she can.  So please stop on over and check out my newest Fall Sign and a little tutorial to go with it as well. 


Sunday, 7 August 2011

Fence Love

Another wonderful weekend has come and gone, I hope that you all had a great weekend as well. 

 I was busy this weekend finishing up my fence project and I am officially in love. I know I know another sign but these will be the last ones for awhile.  


Last summer I took my family on a trip all the way across Canada to Moncton, NB where my dad is from.  My Grandfather has the last standing farm right in the middle of town.  He has this cool old barn filled with years of treasures and memories.  One of them happened to be this sign which I fell in love with while we were there.  So I decided to make a copy of it for my backyard fence project. 


The Original 


My Reproduction


My Antiques Sign


I picked up this cute birdhouse at the dollar store and added some paint to it to add a little bit of fun. 


I am so happy with my finished product.  With extra wood and paint I already had I just had to buy a few 1x4's so this whole fence project cost me under $20.00.  I love how the backyard fells more like a home and not just a backyard.  Truly makes a difference. 

Friday, 29 July 2011

Some more fence Decor

Okay so have I told you that I am in love with 1x4's.  They have endless possibilities, they are inexpensive and so easy to work with.  I have been back and forward to Rona numerous times getting 2 or 3 at a time.  They yard guys are starting to look at me funny, lol.  

I have been building this fantastic wall on the back of my fence, my plan is to fill two panels with some kind of  art.  It really has started to make the space feel like a cozy backyard and a whole lot more personal.  This week I made these boxes by simply cutting some 1x4's to my desired length and then tacking them together with a nail gun.  Give them a quick paint job and finished.  The painting actually took longer than building them.


 I had these terracotta pots stashed under my deck for the past year, they were originally painted blue and white, so I added a splash of green color to the top and once dry I sanded them a bit to give them a worn look. 


This weekend we are packing up the trailer and heading out for my annual family camping trip, we are looking forward to a weekend away.   I love long weekends. 

Hope you all have a great weekend!!!

Wednesday, 27 July 2011

Easy Stepping Stones

This is such a fun and easy Garden Project, you can change it up with different words or pictures.  I found myself a variety of skinny flat rocks than added a couple of coats of paint to the tops.  


I added vinyl to the tops of the rocks but you could also use a stencil or hand draw something on


For this one I found a rock that had a larger bottom on it but still had the flat surface so it could stand up on its own, then again added a coat of the blue paint and some vinyl lettering to the top. 


This would also be a great project to do with the kids and see what they can create.  I know my kids have spent many hours painting rocks.

Monday, 25 July 2011

Front Porch Finished Product

To finish off the front porch update I figured it was time for a little staining. 

 After awhile that nice new pressure treated wood started to look dull and dingy.  My husband has said many times he doesn't like it when people stain pressure treated wood but it looks horrible.


Makai helping me get the space prepped for the stain

This was probably the most sad what fountain I have seen in awhile.  It hasn't actually seen water for at least 3 years and that is for two reasons, first the kids would play in it and empty out the water. The second reason is that that pump just stopped working, probably something to do with the kids emptying the water, lol. So I decided to bring it back to life and re-purpose it, so I made it into a planter.

Before ~ Not so pretty


After ~ Ah so much better


Finally the finished product


There is finally some life in the front porch

Sunday, 24 July 2011

Front Porch Makeover #3 ~ Planter Boxes

This was another one of those "Honey I have an idea" moments.  I wanted to build something that would house my ugly plastic planters so I could have them on the deck.  I came up with this design using some 1x4's, 2x2's  and some leftover cedar planks.    


I am by no means a builder but I thought I would give it a try.  My first task was to build the box and then come up with the rest of it later, I figured if I had something to put it in the rest would come to me later lol.  Once this was done I had to come up with an idea of how the legs would work and how to make this sturdy enough to not tip over.  


I painted them with a nice bright blue and then gave them a white wash paint effect. 


Each Planter box cost me $12.00, so not to shabby for a cute little item.

Saturday, 23 July 2011

Front Porch Makeover #2 ~ Bistro Table Redo

When I originally painted this Chair and Table this fantastic copper color I thought it looked great but it just ended up blending into the deck and not really standing out at all.  I stood in the spray paint aisle for some time trying to decide on what color I should paint it.  I went home and contemplated and then I asked my husband for his opinion.  So as a joke he says paint it pink.  


 So I actually listened to what he said for once, perhaps because I knew he was just saying it so I would stop asking him.  I used a watermelon Color for the Table and Blue for the chairs.  He was a little shocked when he saw it actually painted pink, lol.


I made these cute colorful pillows to put on them, and I couldn't be happier with the finished look.  It is so girly and bright. 

Friday, 22 July 2011

Front Porch Makeover #1

When we built our house 5 years ago the one thing I loved was the front porch on it, I think it just adds that extra space that you can decorate and make a statement with.  Well the only statement it has had in that time was neglect.  It was definitely time for a little bit of a makeover.  


 Okay so yes I forgot to take a before picture of the door color, so I searched through my pictures and this was the best I could come up with.  But hey you get the idea and  you get to see my little cuties too. 


I gave the front door a fresh coat of dark grey paint I had sitting in my basement.


Then I added this fantastic vinyl Welcome sign to the front door. I also decided that the wreath was nice for Easter but had to be changed out for the summer season.  So as I have shown before I created this Summer Love Wreath.


I have much more planned for this makeover so stay tuned.